
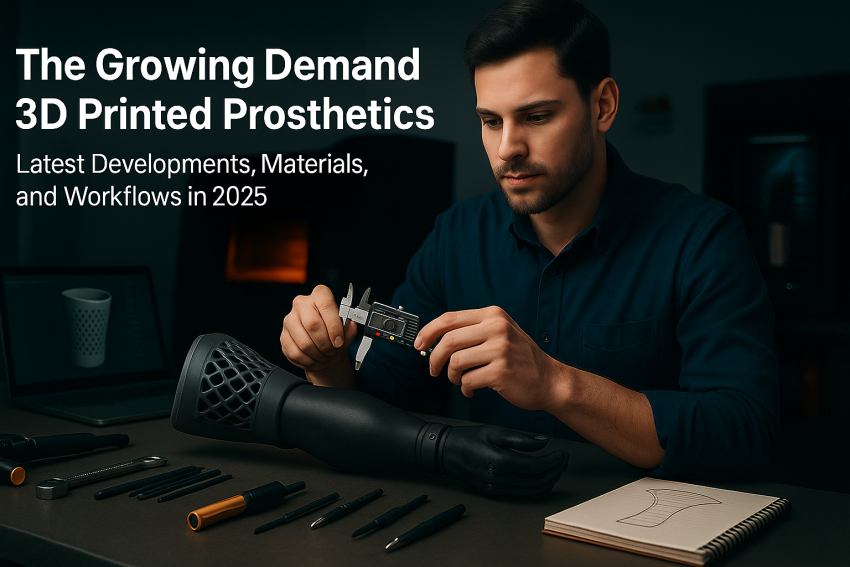
1,771 words, 9 minutes read time.
You want the straight talk. 3D printed prosthetics went from side project to serious kit because they solve the pain you feel on the bench: bad fit, slow refits, and parts that don’t hold up when real life leans on them. Here’s a practical, SEO‑tuned walkthrough of what’s driving demand, what’s working right now, and how to build smarter without cowboying a medical device.
Why Demand for 3D Printed Prosthetics Is Surging in 2025
The market is surging because 3D printed prosthetics cut cost and time while delivering bespoke fit. Traditional sockets and components are handcrafted and solid, but they’re slow to iterate. When your volume changes with training, diet, or weather, waiting weeks feels like your daily driver stuck on jack stands. Scan‑to‑print workflows take that cycle down to days, not months, so users actually wear the device instead of parking it in a closet. Add in better materials, more reliable printers, and cleaner digital pipelines, and you’ve got prosthetics that fit like a favorite glove and can be re‑printed when life changes.
Digital Scan‑to‑Socket Workflow for Custom Prosthetics
A repeatable digital workflow is your competitive edge. Start with clean anatomy capture. Structured‑light scanners are still the gold standard, but smartphone LiDAR and photogrammetry can punch above their weight if you control lighting, capture full coverage, and coach the user to relax so you don’t bake flexed‑muscle artifacts into your model. Once you’ve got the mesh, keep it honest: close holes, remove spikes, and smooth carefully without flattening bony landmarks you’ll need for reliefs. In CAD, build parametric modifiers for trim lines, wall thickness, and relief shapes so you can adjust fit in minutes instead of rebuilding. Treat your slicer profile like a torque spec: lock settings, track versions, and document post‑processing so the next print is repeatable, not a roll of the dice.
3D Scanning Best Practices for Prosthetic Fit
Think tripod, consistent distance, and even lighting. Mark anatomical references if needed, and capture enough overlap to avoid stitching artifacts. For volume‑sensitive sockets, scan at the time of day the user normally swells so you’re not chasing a moving target. File sizes can get hefty, so decimate intelligently—preserve curvature around the brim and distal end where comfort lives and dies.
CAD and Parametric Modeling That Speed Up Revisions
Model for change. Build socket reliefs, flares, and venting as named parameters. Save variant templates for “workday fit,” “gym day,” and “summer swell,” then swap fast. For accessory mounts and tool adapters, align load paths in CAD so you’re not relying on plastic threads to carry shear; design to capture metal inserts and let the print cradle the hardware.
File Hygiene and Slicer Setup You Can Trust
Check normals, run self‑intersections, and verify manifold walls before slicing. For FFF, control perimeters and extrusion widths so you don’t create weak infill‑to‑wall interfaces. For SLS/MJF, mind part spacing, aim for consistent wall thickness to avoid heat soak warping, and orient parts for strength where the body will lean on them.
Best 3D Printing Materials for Prosthetics: PA12, TPU, and CF‑Nylon
Material choice is where projects live or die. SLS or MJF PA12 is the workhorse for structural prosthetic components because it delivers near‑isotropic strength, predictable fatigue life, and a surface that’s easy to finish or seal. TPU earns its keep at the skin interface and anywhere you want subtle damping—liners, compliant zones, and sweat‑friendly pads. Carbon‑fiber‑filled nylon adds stiffness for terminal devices and brackets, but remember stiff is not the same as tough; back it up with smart geometry, fillets, and load‑path alignment. Photopolymer resins from SLA/DLP can look slick and precise, but many don’t love cyclic loading, heat, or UV; reserve them for cosmetic covers, fingers, or low‑load components unless you’ve validated the resin under real‑world punishment.
SLS/MJF PA12 for Structural Reliability
Powder‑bed fusion wins on consistent layer bonding, which trims anisotropy and gives you parts that don’t surprise you under torsion. The micro‑porosity can be an asset for breathability or sealed with epoxy if sweat ingress is a concern. Post‑process with bead blasting, dye, and sealers to hit durability plus comfort.
Flexible TPU for Comfort and Damping
Think of TPU like the mid‑sole on a solid work boot: it doesn’t carry the building, but it makes the day easier. Use it to create compliant pads, micro‑lattice liners, or vibration‑absorbing layers between rigid structures and skin. Validate shore hardness with test coupons, because “90A” on one vendor can feel very different from another.
CF‑Nylon and Engineering Nylons for Rigid Mounts
CF‑nylon shines on camera mounts, tool adapters, and cosmetic cover frames. But don’t tap plastic and expect steel behavior. Use heat‑set inserts or captive nuts, design generous bearing surfaces, and avoid point loads that chew through layers.
Choosing the Right 3D Printing Process: FFF vs. SLA/DLP vs. SLS/MJF
Pick the process that matches the mission. FFF is the Swiss‑Army knife for prototypes, jigs, cosmetic covers, and noncritical adapters—it’s cheap, fixable, and fast to iterate. For load‑bearing parts, be honest about layer adhesion and orient for in‑plane strength whenever possible. SLA/DLP is your surface‑finish king and great for detailed covers or finger assemblies, but most resins still lag in fatigue and heat resistance; use tough or impact blends and field‑test before you trust them. When consistency matters most—sockets, brackets, and parts that will see real torque—SLS/MJF is the adult in the room thanks to more uniform mechanical properties and cleaner repeatability.
Prosthetic Design Best Practices for Comfort and Durability
Comfort isn’t fluff; it’s compliance. Use variable wall thickness and graded lattices to tune stiffness like a suspension: firm where it carries load, forgiving where tissue swells. Fillet every inside corner because sharp edges are crack starters and hotspot creators. Vent where sweat pools and design moisture pathways that actually go somewhere, not just decorative dimples. In high‑load zones—pylons, distal ends, adapters—capture metal inserts and design the plastic as a cradle, not a threaded hero. When a user says “it feels great for 20 minutes, then it bites,” believe him and chase the swelling map with micro‑adjustable reliefs or modular pads.
Myoelectric Control, Electronics, and Safety Considerations
Myoelectric prosthetics and bionic hands are getting cleaner to integrate into printed frames, but cable management and thermal safety matter. Route wires like brake lines with gentle radii and strain relief; keep batteries and drivers away from skin; and design access hatches because you will swap a board at the worst possible time. If you’re tinkering in the shop, stay in the non‑structural lane or work under a certified prosthetist’s supervision. Curiosity is king; unsupervised medical engineering is not.
Standards, Testing, and Regulatory Guidance (ISO 10328, ISO 22523, FDA)
Quality systems aren’t red tape—they’re your warranty against failure. Design structural parts with ISO 10328 load cases in mind and validate them with coupons and fixtures that mimic real life. External prosthetics and orthotics align with ISO 22523 requirements and testing; follow them so you’re not guessing at safety. In the U.S., the FDA’s additive manufacturing guidance spells out what to document: machine parameters, post‑processing, cleaning, and verification. Build your workflow like a torque chart with controlled inputs and logged outputs so you can reproduce a “good” print on demand.
Real‑World Lessons from Clinics and Makers
Open communities proved the model: share designs, iterate fast, and keep users in the loop. e‑NABLE showed how open‑source hands can change a kid’s life and how design evolves when dozens of builders pressure‑test it. Open Bionics’ Hero Arm taught the field that aesthetics boost wear time because a device you’re proud to show is a device you’ll actually use. Point‑of‑care shops that print sockets and covers near the patient consistently slash refit time and rework because feedback happens face‑to‑face, not over weeks of emails.
Getting Started the Right Way: Safe Projects and Collaboration
If you’re hungry to contribute, start where you can do no harm and still make a difference. Cosmetic covers transform perception and confidence, and they’re perfect for SLS, MJF, or well‑tuned FFF. Adaptive tools—wrench adapters, bike grips, controller mounts—change daily life without touching weight‑bearing systems. Abuse test coupons to learn your rig’s truth instead of trusting marketing numbers. Then partner with a certified prosthetist when you move into sockets or structural parts; your digital chops plus their clinical read is the right two‑man lift.
Future of 3D Printed Prosthetics: Multi‑Material, Soft Robotics, and Point‑of‑Care
Multi‑material builds are coming out of the lab, which means rigid load paths blended with soft skin interfaces in a single print. Printable silicones are maturing, promising liners that breathe and fit like they grew there. Soft‑robotic grippers are proving you don’t need five rigid fingers to get the job done; compliant graspers can be lighter, gentler, and easier to maintain. On the software side, AI‑assisted scan‑to‑fit is already cutting design time by flagging reliefs and trim lines, and as clinics gather more data, those suggestions get smarter and faster.
Conclusion: Build Smarter, Print Better, Fit Faster
The demand curve is up because 3D printed prosthetics finally deliver what matters: comfort, strength, and speed without the runaround. Respect the loads, validate your parts, document your process, and design like someone’s workday depends on it—because it does. When a user says his new socket feels like a well‑balanced hammer—something he reaches for without thinking—you’ll know you nailed it.
Ready to push this from “interesting” to “impactful”? Subscribe to the newsletter now at https://wordpress.com/reader/site/subscription/61236952 for deep dives, dialed‑in print profiles, and real test data. Join the conversation by dropping a comment below—tell me your current rig and go‑to materials. Or if you want to collaborate on a clinic‑grade workflow or have questions about standards and testing, hit the contact form and let’s build something that lasts: https://bdking71.wordpress.com/contact/
Sources
- FDA: Technical Considerations for Additive Manufactured Medical Devices
- ISO 10328: Prosthetics — Structural testing of lower-limb prostheses
- ISO 22523: External limb prosthetics and orthotic devices — Requirements and test methods
- WHO: Standards for Prosthetics and Orthotics
- e-NABLE: Open-source 3D printed prosthetics community
- Open Bionics: Hero Arm
- Limbitless Solutions: Bionic arms and research
- UNYQ: 3D printed prosthetic covers
- 3D LifePrints: Point-of-care 3D printed medical devices
- NIH 3D Print Exchange
- Formlabs: 3D Printing for Orthotics and Prosthetics
- Stratasys: Orthotics & Prosthetics Solutions
- ProsFit: Digital prosthetic socket solutions
- BASF Forward AM: Ultrasint TPU 88A for 3D printing
Disclaimer:
The views and opinions expressed in this post are solely those of the author. The information provided is based on personal research, experience, and understanding of the subject matter at the time of writing. Readers should consult relevant experts or authorities for specific guidance related to their unique situations.