

5,030 words, 27 minutes read time.
Introduction
3D printing has revolutionized the way we create and manufacture objects, bringing a new level of accessibility and customization to production processes. Originating from the early 1980s with Charles Hull’s invention of stereolithography, 3D printing has rapidly evolved from a niche technology into a mainstream tool that impacts various aspects of our daily lives. This technology allows users to build three-dimensional objects layer by layer from digital models, a method that contrasts sharply with traditional manufacturing techniques that often involve subtracting material. As a result, 3D printing enables the production of intricate designs and customized items with minimal waste, opening up exciting possibilities for both hobbyists and professionals.
The advent of 3D printing has made it possible for individuals and small businesses to undertake a wide range of projects from the comfort of their own homes. Whether you are interested in prototyping new products, creating bespoke parts, or exploring artistic ventures, understanding the fundamentals of 3D printing is essential. With a variety of printing technologies available, such as Fused Deposition Modeling (FDM) and Resin Printing, each offering distinct advantages and applications, navigating this technology can seem daunting at first. However, grasping the basics of how 3D printers work and what materials they use will help you make informed decisions and unlock the full potential of this innovative tool.
This guide is designed to provide a comprehensive introduction to the world of 3D printing, covering everything from selecting your first printer to mastering the creation of your own designs. By understanding the various types of 3D printers and materials, as well as the processes involved in preparing and executing prints, you will be well-equipped to start your 3D printing journey. Whether you’re looking to develop functional prototypes, personalized gifts, or unique art pieces, this guide will offer the insights and knowledge needed to get started and succeed in the exciting realm of 3D printing.
What is 3D Printing?
3D printing, also known as additive manufacturing, has a compelling history that traces back to the early 1980s. The initial concept was developed by Dr. Hideo Kodama of the Nagoya Municipal Industrial Research Institute, who first explored rapid prototyping using photopolymers. However, it was Charles Hull’s invention of stereolithography (SLA) in 1984 that marked the true beginning of modern 3D printing. Hull’s creation provided a practical method for creating three-dimensional objects layer by layer from a digital model, laying the foundation for what would become a transformative technology. Hull also founded 3D Systems, a company that remains a major player in the industry.
At its core, 3D printing involves building objects layer by layer based on a digital design. Unlike traditional manufacturing techniques that often subtract material through cutting or drilling, 3D printing adds material incrementally. This additive process allows for the creation of complex and intricate designs that are often challenging or impossible to achieve with conventional methods. Furthermore, the reduction in material waste associated with 3D printing contributes to its environmental benefits, offering a more sustainable approach to manufacturing.
To begin the 3D printing process, you need a digital 3D model, typically created with computer-aided design (CAD) software. This model is sliced into thin horizontal layers by slicing software, which generates a file containing instructions for the 3D printer. The printer then reads this file and deposits material layer by layer to build the object. Each layer is fused to the previous one, resulting in a precise and detailed final product. This method allows for high levels of control over the object’s shape and structure, making it possible to produce highly customized items.
In recent years, 3D printing has become increasingly accessible for home use, enabling enthusiasts to engage in a variety of creative and practical projects. Home 3D printers are available in a range of sizes and price points, making it feasible for hobbyists and DIYers to create custom phone cases, household gadgets, art pieces, and replacement parts. Among the most popular technologies for home use are Fused Deposition Modeling (FDM) and Resin Printing.
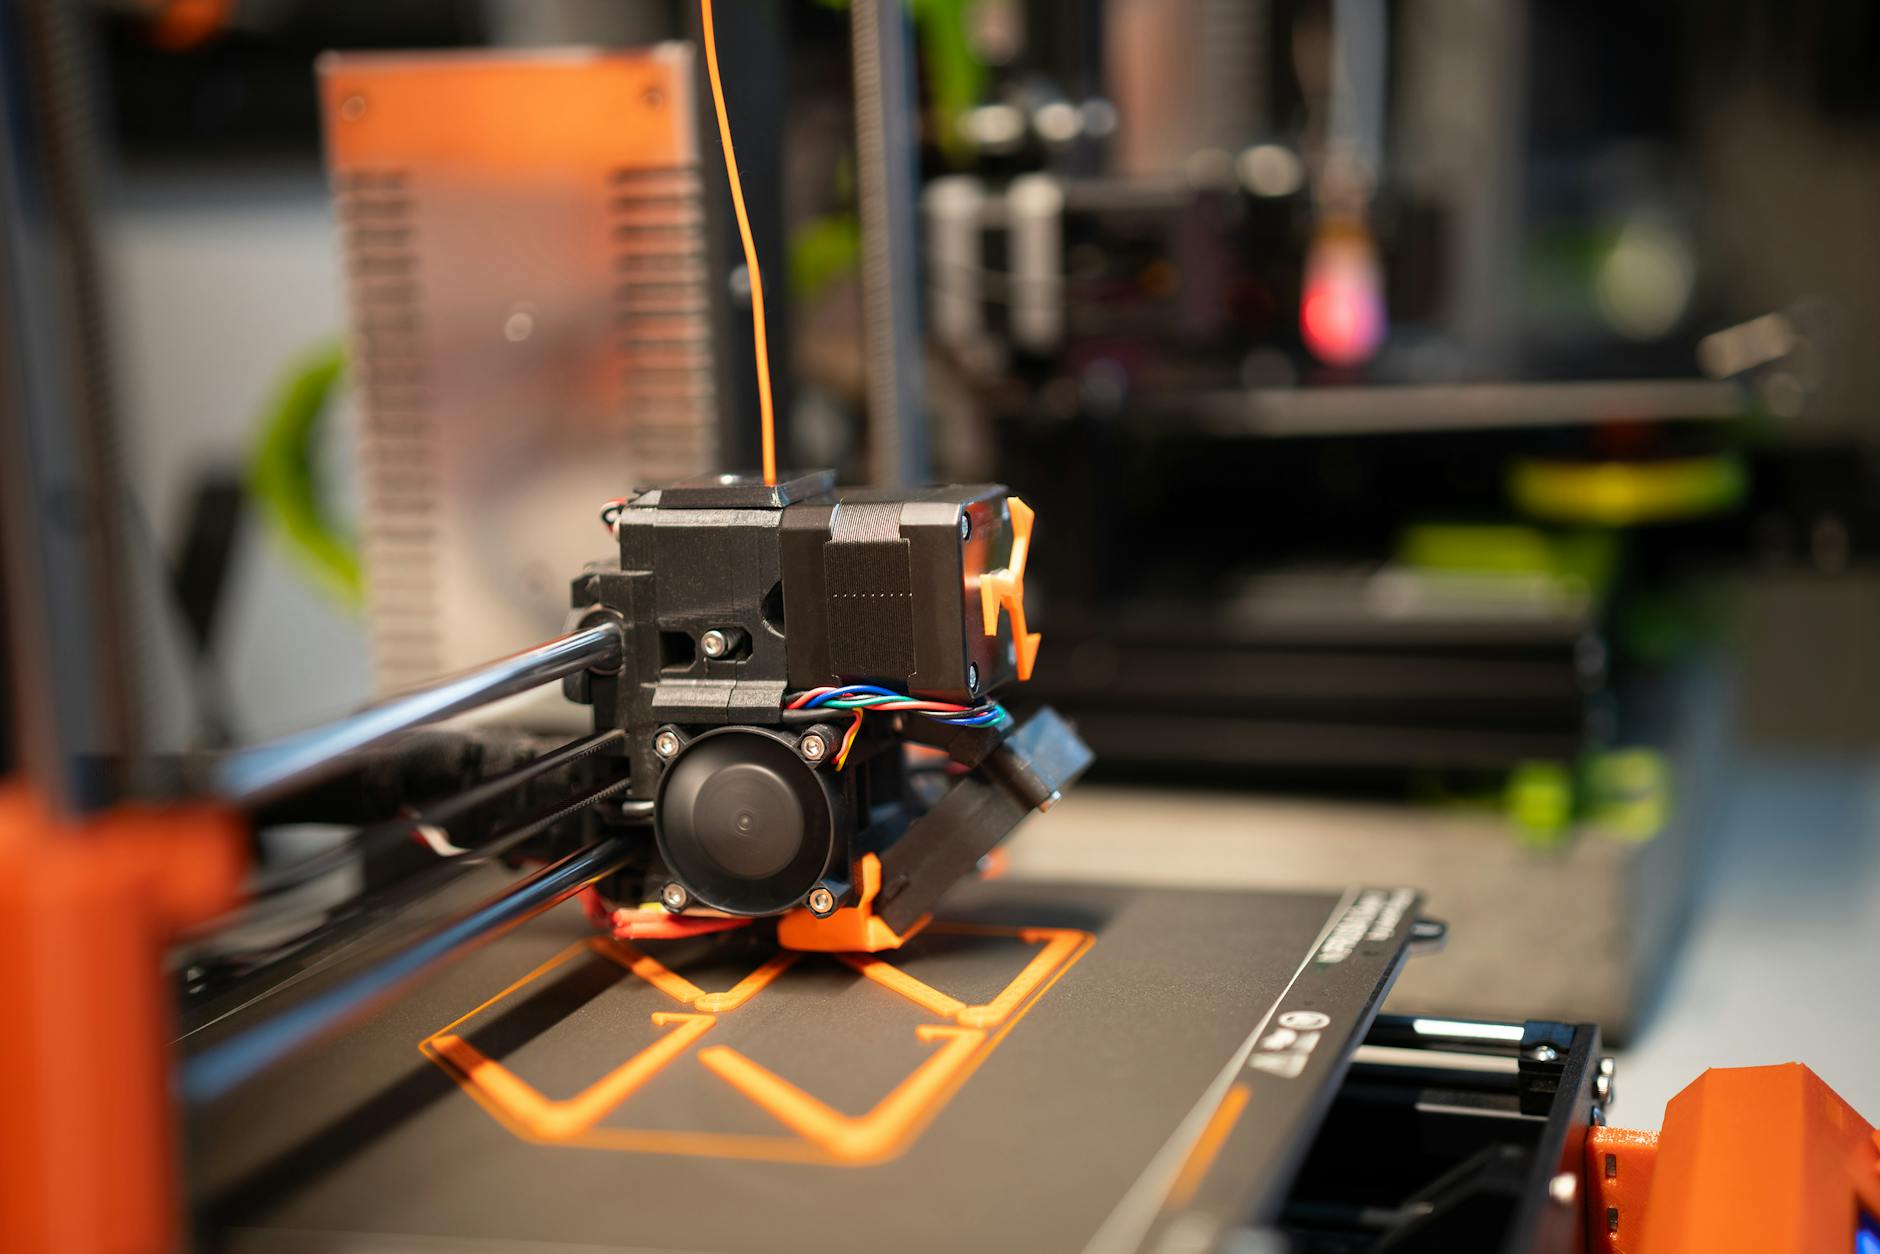
Fused Deposition Modeling (FDM) is one of the most common and cost-effective 3D printing technologies for home users. FDM printers work by melting a thermoplastic filament, such as PLA (Polylactic Acid) or ABS (Acrylonitrile Butadiene Styrene), and extruding it through a heated nozzle to form each layer of the object. FDM printers are valued for their affordability, ease of use, and the wide variety of available materials. They are ideal for producing functional prototypes, educational models, and practical items. However, FDM prints can sometimes have a rough surface finish, and achieving high precision may require careful adjustment of printer settings.
Resin printing, which includes Stereolithography (SLA) and Digital Light Processing (DLP), uses liquid resin that is cured layer by layer by a UV light source. Resin printers are renowned for their ability to produce highly detailed and smooth surface finishes, making them well-suited for applications that require fine detail, such as jewelry or detailed miniatures. Although resin printers offer superior print quality, they generally come with higher initial costs and require more extensive post-processing compared to FDM printers. Handling resin also requires safety precautions due to the potentially hazardous nature of the chemicals used in the process.
The choice between FDM and resin printing often depends on the specific needs and preferences of the user. FDM printers are versatile and suitable for a broad range of applications, offering an affordable and user-friendly option for many home users. On the other hand, resin printers excel in producing high-precision, detailed prints, making them ideal for specialized applications despite their higher cost and more complex post-processing requirements. Understanding the characteristics of each technology will help you select the best option for your 3D printing projects.
Choosing Your First 3D Printer
Selecting the right 3D printer is a crucial step in beginning your 3D printing journey, and it involves evaluating various factors such as budget, intended use, and available space. For newcomers, it’s beneficial to start with a printer that balances affordability and user-friendliness, offering a good introduction to the technology. As you gain experience, you might consider upgrading to more advanced models with enhanced features and capabilities.
Filament Printers:
Fused Deposition Modeling (FDM) printers are a popular choice among newcomers due to their cost-effectiveness and ease of operation. The Creality Ender 3 and Anycubic i3 Mega are two highly recommended entry-level models. These printers offer a good balance of price and performance, making them accessible for those new to 3D printing.
FDM printers typically operate within a print speed range of 30 to 100 mm/s. While higher speeds can reduce print times, they may lead to problems such as reduced layer adhesion, increased visibility of layer lines, and overall diminished print quality. For intricate or detailed prints, a slower speed of approximately 30-50 mm/s is often more suitable, as it allows for finer detail and smoother finishes.
Additionally, understanding the impact of print speed on material properties is important. Different filaments, such as PLA, ABS, or PETG, have varying optimal print speeds and temperature requirements. For instance, PLA is known for its ease of use and lower print temperature, while ABS requires higher temperatures and a heated build plate to prevent warping. Experimenting with different speeds and temperatures based on the filament used will help achieve the best results.
In addition to the printer itself, several accessories can significantly enhance your FDM printing experience. A heated build plate is one of the most valuable additions, as it improves adhesion of the first layer and helps to reduce warping and layer separation, which is especially important for larger prints or materials prone to warping like ABS.
An enclosure can also be beneficial, especially for printing with materials sensitive to temperature fluctuations or drafts, such as ABS. Enclosures help maintain a consistent printing environment by regulating temperature and shielding prints from external drafts, which can lead to print defects.
Moreover, investing in a filament drying box is advisable if you live in a humid environment. Moisture can adversely affect filament, leading to issues such as bubbling, stringing, or poor layer adhesion. A filament drying box maintains optimal conditions for filament storage, ensuring consistent print quality.
Resin Printers:
Resin-based 3D printers, including those using Stereolithography (SLA) or Digital Light Processing (DLP), use liquid photopolymers that are cured by UV light. This curing process can release fumes containing volatile organic compounds (VOCs), which can be hazardous if inhaled. VOCs are chemicals that evaporate at room temperature and can cause health issues such as respiratory irritation, headaches, and other symptoms if proper ventilation is not maintained. Therefore, managing these emissions is a key consideration when operating resin printers.
Many resin printers come with built-in enclosures and air filtration systems, including activated carbon filters, to help manage VOC emissions. Activated carbon filters work by adsorbing VOCs and other contaminants from the air, significantly reducing exposure to harmful fumes. However, if your printer lacks these features, it is crucial to invest in a separate ventilation system. Options include exhaust fans or fume extractors designed to pull fumes out of the workspace and replace them with fresh air, ensuring a safer environment.
Handling resin requires additional safety measures due to its chemical nature. Users should always wear gloves and protective eyewear to avoid direct contact with the liquid resin, which can cause skin irritation or eye damage. The post-processing of resin prints involves cleaning the objects in isopropyl alcohol and further curing them under UV light. Both processes release additional fumes, emphasizing the need for a well-ventilated workspace. A dedicated cleaning station equipped for alcohol cleaning and a UV curing chamber are essential tools for managing these processes safely.
Moreover, proper storage and handling of resin are crucial for maintaining its effectiveness and safety. Resin should be kept in a cool, dark place to prevent premature curing and degradation, which can affect print quality. An organized workspace with good ventilation and filtration will help manage the small, intricate parts associated with resin printing, ensuring a smoother workflow and safer operation.
Choosing the right 3D printer involves understanding the technical specifications, additional equipment, and safety measures necessary for optimal performance and user safety. Whether opting for an FDM or resin printer, being aware of these considerations will help you make an informed decision and establish a productive and safe 3D printing environment
Essential Materials for 3D Printing
The choice of material, or filament, is pivotal in 3D printing as it affects the print’s quality, durability, and functionality. Various materials offer distinct properties, making it crucial to select the right filament based on your project’s specific needs. Here’s a detailed overview of common and specialty filaments, including resins and water-soluble resins, along with the associated printing challenges.
PLA (Polylactic Acid) is one of the most popular and beginner-friendly filaments available. Made from renewable resources like corn starch or sugarcane, PLA is known for its eco-friendliness and low environmental impact. It is easy to print with, adhering well to the build plate without requiring a heated bed, which simplifies the printing process. PLA produces minimal odor during printing, making it suitable for indoor use. However, PLA has some limitations. It has lower heat resistance compared to other filaments, potentially deforming or softening when exposed to temperatures above 60°C (140°F). This makes it unsuitable for parts subjected to high temperatures. Additionally, while PLA is generally strong, it can be brittle and prone to cracking under stress or impact, and it is not ideal for functional parts requiring high mechanical strength or flexibility. PLA is also not UV resistant, which can lead to degradation when exposed to sunlight for extended periods, limiting its use for outdoor applications.
ABS (Acrylonitrile Butadiene Styrene) is favored for its strength, durability, and heat resistance. It is commonly used in applications requiring tough, impact-resistant parts and can withstand higher temperatures than PLA, making it suitable for objects exposed to heat or mechanical stress. However, ABS requires a heated build plate to prevent warping and ensure proper adhesion to the print bed. During printing, ABS emits strong fumes and VOCs, so a well-ventilated area or an enclosure with filtration is recommended to manage these emissions. ABS can be more challenging to print with due to its tendency to warp and its sensitivity to temperature fluctuations, necessitating fine-tuning of printer settings and environmental controls to achieve good results.
PETG (Polyethylene Terephthalate Glycol) combines the best features of PLA and ABS. It offers high strength and durability while being relatively easy to print. PETG is less prone to warping and has better layer adhesion compared to ABS, making it suitable for a range of applications. It also has good chemical resistance and is less brittle than PLA, which makes it a versatile choice for various projects. However, PETG can exhibit stringing or oozing during printing due to its sticky nature, which can be managed by adjusting retraction settings and print speed. While PETG generally adheres well to the build plate, it can sometimes cause adhesion problems if the build surface is not properly prepared or leveled. Additionally, PETG can produce a glossy finish, which may not be desirable for all applications, requiring fine-tuning of print settings and post-processing to achieve the desired surface quality.
Specialty filaments include Flexible TPU (Thermoplastic Polyurethane), which allows for the creation of rubber-like parts ideal for applications requiring elasticity, such as phone cases or custom gaskets. TPU is more challenging to print with due to its flexibility, which requires adjustments to print settings and extruder mechanisms. Its flexibility makes it difficult to handle and feed through the extruder, often necessitating a direct-drive extruder or specific settings to manage this flexibility. TPU can also produce stringing and blobs if not properly tuned, which can be managed by adjusting retraction and print speed settings.
Wood-Filled Filaments, composed of a mix of PLA and finely ground wood fibers, give prints a wood-like appearance and texture. These can be sanded and stained to achieve a realistic wood finish. However, the wood fibers can be abrasive, potentially causing wear and tear on the nozzle, so using a hardened nozzle is advisable. Wood-filled filaments can also clog the nozzle if not properly maintained or if the filament is not dried sufficiently before use.
Metal-Filled Filaments contain metal powder mixed with PLA or other base materials, producing prints with a metallic finish and added weight. The metal powder can be abrasive, requiring a hardened nozzle to prevent damage, and regular maintenance of the nozzle is necessary. Metal-filled filaments can result in heavier prints, which may affect the printing process and the printer’s mechanics, necessitating adjustments to print settings to accommodate the increased density.
Resins for SLA and DLP Printers use liquid photopolymers cured by UV light, offering high detail and smooth finishes, making them ideal for intricate and high-resolution prints. Resins come in various formulations, including standard, tough, flexible, and castable resins, each designed for specific applications. However, resin-based printing presents challenges. The curing process releases volatile organic compounds (VOCs) and other fumes, making proper ventilation crucial. Using an enclosed printer with built-in air filtration can help manage these emissions. Handling resin requires wearing gloves and protective eyewear to avoid skin and eye irritation. Post-processing involves cleaning the prints in isopropyl alcohol and further curing them under UV light, both of which can release additional fumes. A dedicated cleaning station and UV curing chamber are essential tools for managing these processes safely. Resins should be stored in a cool, dark place to prevent premature curing and degradation, and maintaining a clean, well-ventilated workspace is important for optimal print performance.
Water-Soluble Resins are designed for use in dual-material 3D printing systems, dissolving in water to create complex structures with internal supports that are easy to remove after printing. This process requires careful calibration and understanding of the dual-material printing setup. Although water-soluble resins simplify the removal of supports, they require thorough washing and drying to prevent any residual resin from affecting the final print. Proper storage conditions are vital to maintaining resin quality and print performance, and keeping the printing environment clean and free of moisture is essential.
When selecting a filament or resin, consider the specific requirements of your project, such as mechanical properties, environmental exposure, and ease of printing. Beginners may find PLA to be a good starting point due to its simplicity and user-friendly characteristics. As you gain more experience, exploring other filaments like ABS or PETG, and specialty materials like flexible TPU, metal-filled, or water-soluble resins, can help achieve more complex and specific outcomes. By understanding the properties, applications, and challenges of different materials, you can make informed decisions to enhance the quality and functionality of your 3D prints.
4. Finding or Creating 3D Models
One of the most exciting aspects of 3D printing is the ability to transform digital designs into tangible objects. There are two primary methods for obtaining 3D models: downloading them from online repositories or creating your own. Each approach offers its own set of advantages and challenges, catering to different needs and preferences.
Online Repositories provide an extensive array of pre-made 3D models, making them a valuable resource for both beginners and experienced users. Websites such as Thingiverse, MyMiniFactory, and Cults3D host vast libraries of free and paid models that cover a wide range of categories. These platforms offer everything from practical tools and functional parts to intricate sculptures and decorative items. Using these pre-made models can significantly streamline your workflow, saving time and providing inspiration for your projects. It allows you to focus on the printing process rather than the design phase, making it an ideal choice for those who are new to 3D printing or who need a quick solution for their needs. However, relying on free models may come with limitations, such as restricted customization options and potential licensing issues. While many models are free to use, some might have specific terms of use or restrictions on commercial applications.
Designing Your Own Models grants you complete creative control and the ability to produce highly customized objects tailored to your specific needs. For those interested in more advanced design capabilities, tools like Fusion 360 offer powerful features suitable for engineering and complex designs. Fusion 360 is particularly well-regarded for its parametric design capabilities, allowing users to create precise and adjustable models that can be easily modified as needed. This software integrates various design approaches, including 3D modeling, simulation, and collaborative features, making it ideal for creating functional parts, prototypes, and complex assemblies.
Designing your own models also opens up opportunities to explore and implement advanced features such as multi-material printing and custom supports, which are not always available with pre-made models. With Fusion 360, users can benefit from a comprehensive suite of tools that include sketching, sculpting, and simulation, enabling the creation of highly detailed and functional designs. This can be particularly valuable for applications requiring specific tolerances or intricate details, such as mechanical components, custom tools, or bespoke artistic pieces.
The process of designing your own models, while immensely rewarding, involves a learning curve and can be time-consuming. Mastering Fusion 360 or any other design software requires investment in time and effort, as well as a certain level of technical proficiency. For instance, understanding how to use parametric constraints in Fusion 360 to ensure that all parts of a model fit together perfectly can take some time to learn but is crucial for creating functional designs. Additionally, attention to detail is necessary to ensure that the designs are not only visually appealing but also printable and functional.
Pros and Cons of Each Approach:
Designing your own models has distinct advantages, including full customization, the freedom to explore your creativity, and the opportunity to learn valuable skills. It allows you to bring completely original concepts to life, which can be especially fulfilling for hobbyists and professionals alike. However, this approach can be time-consuming and requires a significant learning curve, which might be challenging for those just starting with 3D printing.
On the other hand, using free models online is a time-saving approach that provides immediate access to a wide range of designs. It is a straightforward way to begin printing without needing to invest time in learning design software. However, this method offers limited customization options and may come with licensing restrictions that could affect how you use or share the models. For those who prefer to focus on the printing process rather than the design aspect, or who need a quick solution, online repositories are an excellent resource.
Ultimately, whether you choose to use pre-made models or design your own will depend on your specific needs, goals, and level of experience. Both approaches offer valuable benefits, and many users find that a combination of both—using pre-made models for certain projects and designing custom models for others—can provide a balanced and versatile 3D printing experience.
5. Preparing Your Model for Printing
Before you can start printing, your 3D model needs to be converted into instructions that your 3D printer can interpret. This crucial step is achieved using slicing software, such as Cura, PrusaSlicer, or Simplify3D. Slicing is the process of dividing your 3D model into thin horizontal layers, effectively “slicing” it into manageable sections that the printer can build layer by layer. This software translates the 3D model into G-code, a set of commands that guides the printer on how to construct each layer with precise movements and material deposition.
When using slicing software, you’ll need to configure several key settings to ensure the best results. Layer height determines the thickness of each layer and affects the print’s resolution and overall finish; smaller layer heights lead to finer details but longer print times, while larger heights speed up the process but can reduce detail. Infill density controls how much material is used inside the model, influencing its strength and weight. A higher infill density provides more strength but increases print time and material usage, whereas a lower density can reduce both but may compromise durability. Print speed dictates how fast the printer moves while depositing material; adjusting this can impact both print quality and duration, with slower speeds often yielding better accuracy and surface finish.
Optimizing these settings is essential for achieving high-quality prints while minimizing print time and material waste. By carefully adjusting parameters such as layer height, infill density, and print speed, you can enhance the final output and ensure that your 3D prints meet your expectations.
6. The Printing Process
Once your model is sliced and prepared, it’s time to initiate the printing process. Start by setting up your 3D printer, making sure that the print bed is properly leveled and the filament is correctly loaded. Calibration and bed leveling are critical steps to ensure that your prints adhere well and are accurately formed.
As your printer begins its work, it’s important to monitor the printing process closely. This allows you to identify and address any issues that may arise early. Common problems to watch for include bed adhesion failures, where the print may not stick properly to the bed; filament jams, which can disrupt the flow of material; and layer shifting, which occurs when the layers of the print are misaligned. By keeping an eye on these potential issues and learning to troubleshoot them effectively, you can prevent wasted time and material, ensuring a smoother and more successful printing experience.
In addition to hardware setup, several software tools can assist in managing the printing process. For example, OctoPrint is a popular web-based application that allows you to remotely monitor and control your 3D printer. It provides real-time camera feeds, print progress updates, and the ability to pause or stop prints remotely. Pronterface is another useful tool for direct communication with your printer, offering control over print parameters and diagnostics. MatterControl provides an integrated solution combining slicing, printer control, and model management, while Repetier-Host offers similar features with additional customization options. Utilizing these software tools can greatly enhance your ability to oversee and manage your 3D printing tasks effectively.
Post-Processing Your Prints
After printing, your object may require post-processing to achieve the desired finish and functionality. Manual Finishing is often the first step, involving careful trimming and cutting to remove excess material, such as support structures or remnants of the raft. Tools like flush cutters or hobby knives can be used for this purpose. Following trimming, sanding is usually necessary to smooth out rough surfaces and remove layer lines. This is done using sandpaper, starting with coarse grits and progressing to finer ones to achieve a smooth finish. For intricate details, sanding sponges or sanding sticks may be utilized. To further enhance the surface, polishing can be done using polishing compounds or buffing wheels, which brings out a glossy finish after sanding.
Painting is another essential post-processing technique that improves both the appearance and durability of your print. The process often begins with applying a primer, which helps to seal the print and create a uniform surface for painting, as well as improving paint adhesion. Acrylic paints are commonly used due to their excellent adhesion to most materials and their wide range of available colors. These paints can be applied with brushes or spray cans, depending on the desired effect. To protect the paint and add a glossy or matte finish, a clear coat is often applied, which also helps seal the print and make it more durable.
For models composed of multiple parts, Assembly is crucial. This involves joining the separate pieces using adhesives such as super glue, epoxy, or plastic welds, depending on the materials used. Proper assembly ensures that the model functions as intended and maintains its structural integrity.
Advanced techniques offer additional finishing options. Vapor Smoothing is particularly effective for ABS prints and involves exposing the object to solvent vapor, such as acetone. This method melts the surface slightly, smoothing out layer lines and resulting in a glossy, professional finish. Chemical Smoothing is similar but uses different solvents for various materials like PLA or PETG to dissolve the outer layer of the print and smooth imperfections. Hydrographic Printing, or water transfer printing, applies a printed film to the surface of the object by dipping it in water, creating decorative patterns and designs. Dyeing is another technique used for certain materials, such as nylon, where specialized dyes are used to achieve vibrant, uniform colors throughout the print.
Functional Post-Processing techniques include heat treatment to improve strength and stability. This may involve annealing to relieve internal stresses or enhance material properties. Sealing and coating the print can also increase durability and resistance, which is particularly important for outdoor or functional parts exposed to wear and tear.
Surface Treatments like electroplating provide a metallic finish by depositing a thin layer of metal onto the print, enhancing both appearance and strength. Another technique, Flocking, applies a layer of fine fibers to create a velvety texture, often used for decorative purposes or specific textures. Each post-processing method requires different tools, techniques, and best practices, and experimenting with these methods can help you achieve the perfect finish for your 3D prints.
8. Tips and Best Practices for Beginners
To ensure a smooth and successful 3D printing experience, it is essential to follow several key tips and best practices.
Safety First: Always operate your 3D printer in a well-ventilated area to avoid exposure to fumes and dust. Adhere to safety guidelines, such as wearing protective gear and keeping the printing area free of flammable materials, to prevent accidents and injuries.
Regular Maintenance is crucial for keeping your printer in optimal working condition. This involves routine tasks such as cleaning the nozzle to prevent clogs, checking and tightening belts and screws to ensure proper movement, and updating the firmware to benefit from the latest features and bug fixes. Consistent maintenance helps avoid common issues and extends the life of your printer.
Calibrate Your Printer Regularly: Proper calibration is key to achieving accurate and high-quality prints. Regularly check and adjust the bed leveling and nozzle height to ensure optimal adhesion and precision.
Use Quality Filament: Invest in high-quality filament to avoid issues such as inconsistent extrusion or poor layer bonding. Quality filament can significantly impact the final appearance and durability of your prints.
Monitor Your Prints: While many prints can be left unattended, it is wise to periodically check on your progress. This helps identify and address issues like filament jams or layer misalignment early, preventing potential print failures.
Optimize Print Settings: Experiment with different settings for layer height, infill density, and print speed to find the optimal balance between print quality and efficiency for your specific project.
Keep a Print Log: Documenting details about each print, including settings used and any issues encountered, can be incredibly helpful for troubleshooting and improving your skills over time.
Manage and Store Filament Properly: Filament should be stored in a cool, dry place to prevent moisture absorption, which can affect print quality. Using airtight containers or filament dryers can help maintain filament in good condition.
Engage with the Community: Joining online and local 3D printing communities provides access to a wealth of knowledge and resources. Platforms such as Reddit, Facebook groups, and specialized forums are excellent for exchanging ideas, seeking advice, and finding inspiration. Engaging with fellow enthusiasts and experts can offer valuable insights and support, making your 3D printing experience more enjoyable and productive.
By following these tips and best practices, you’ll be well-equipped to tackle the challenges of 3D printing and achieve successful results with your projects.
Conclusion
3D printing unlocks a realm of endless possibilities for creativity, innovation, and problem-solving. With a solid understanding of the basics, careful selection of the right equipment, and a willingness to delve into the details of the process, you’re ready to embark on an exciting journey in the world of 3D printing. Embrace the learning curve, experiment with different techniques, and let your imagination lead the way. Remember, every mistake is a step towards mastering the craft. For ongoing inspiration, further reading, and advanced insights, numerous resources and communities are at your disposal to guide you. If you found this guide helpful, please subscribe for more updates and share your thoughts or questions in the comments below. Happy printing!