
Note: I’ve created a GitHub Repository for this Demo Project.
When I initially started writing this series, I decided not to have any properties associated with the demo WebPart I was developing. I was new to writing SPFx Webparts, so I decided it would make the project a bit simpler for me and others to understand. Also, by initially removing the properties, I now have a chance to write an post about WebPart properties.
In this post, we are going to add back in the properties, and we are going to add a few new proprieties to make our WebPart more useful.
Original Code snippet without a interface for the properties.
When you run the scaffolding for a SPFx WebPart, the generator creates the properties interface. Since I deleted it thinking I wouldn’t need it for the original demo, I now an going to recreate it. The generator creates each WebPart with a description property. I am going to add three more properties to this WebPart: (1) Title, (2) SiteURL, and (3) List.
These new field will give the user adding the WebPart the opportunity to define the title of the WebPart, the Site URL where the data resides, and the name of the list to get the data from. This is very useful when your data lives in another site collection.
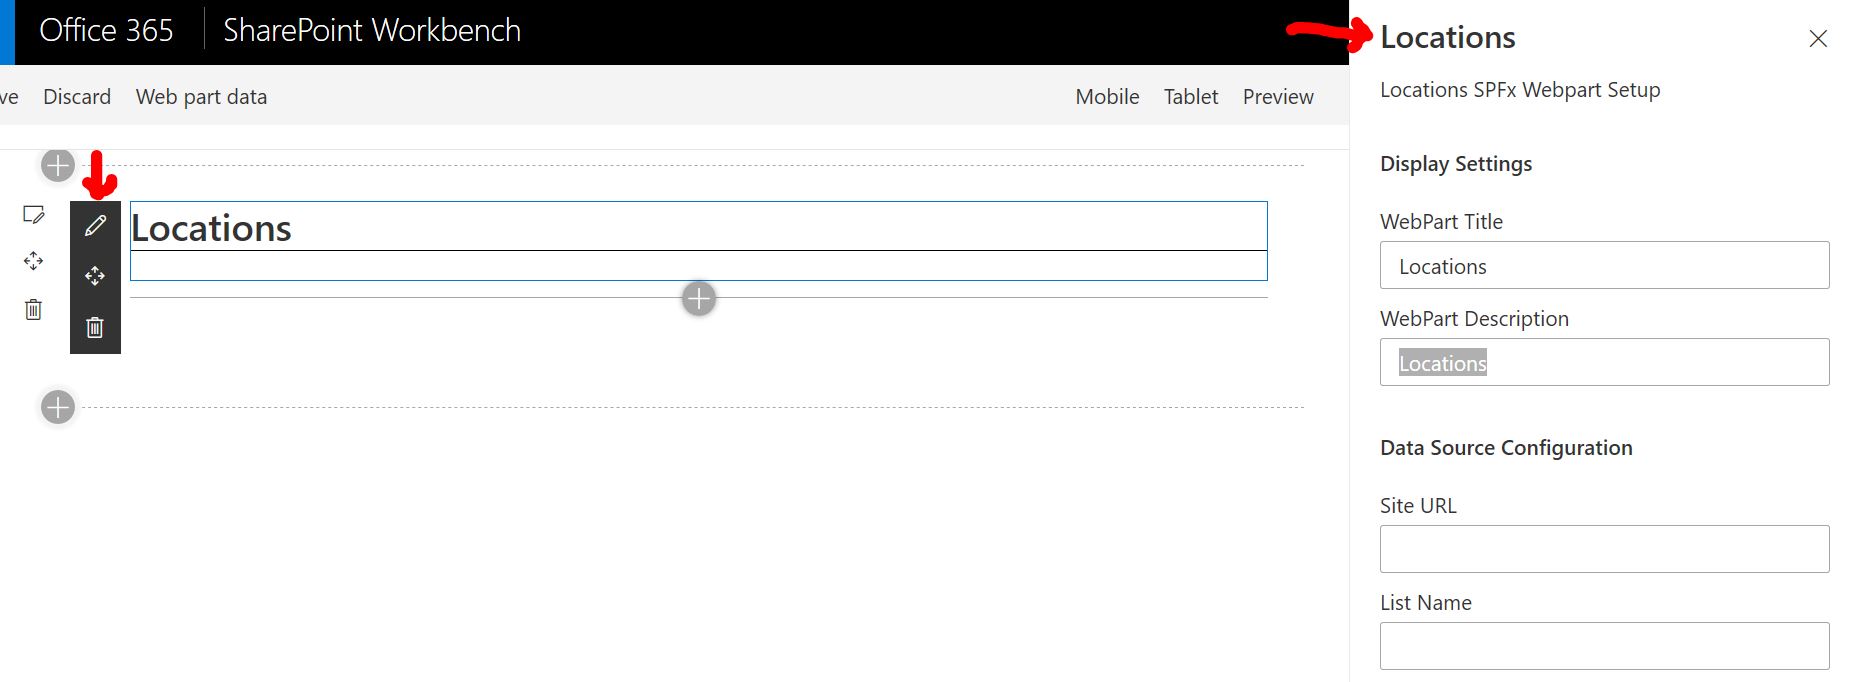
A screenshot of what our properties pane will look like in the SharePoint Workbench.
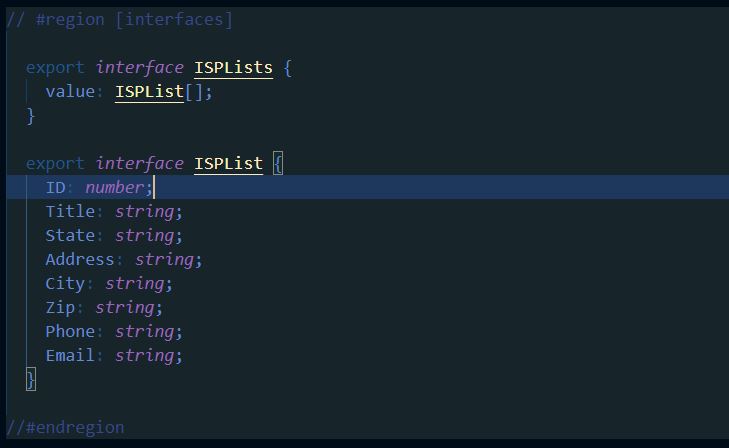
Here are the changes to my interfaces section of file named <Source DIRECTORY>\src\webparts\locations\locationsLocationsWebPart.ts.
// #region [interfaces]

  export interface ILocationSPFxWebPartProps {
    title: string;
    description: string;
    siteURL: string;
    list: string;
  }

  export interface ISPLists {
    value: ISPList[];
  }

  export interface ISPList {
    ID: number;
    Title: string;
    State: string;
    Address: string;
    City: string;
    Zip: string;
    Phone: string;
    Email: string;
  }

//#endregion

export default class LocationsWebPart extends BaseClientSideWebPart<ILocationSPFxWebPartProps> {
I should mention that when I removed the properties interface, I had to change the default class “extends” statement. In the code above, I have set it to the properties interface I created.
Next we need to add the code to display the properties pane. I’ve did a couple of things different from the OOTB scaffolding. One, I didn’t use the strings variable. I set all my names using a literal string. Second, I created two groups. One for Display Settings with Title and Description, and a second group for defining the data source.
protected getPropertyPaneConfiguration(): IPropertyPaneConfiguration {
      return {
        pages: [
          {
            header: {
              description: "Locations SPFx Webpart Setup"
            },
            groups: [
              {
                groupName: "Display Settings",
                groupFields: [
                  PropertyPaneTextField('title', {
                    label: "WebPart Title"
                  }),
                  PropertyPaneTextField('description', {
                    label: "WebPart Description"
                  })
                ]
              },
              {
                groupName: "Data Source Configuration",
                groupFields: [
                  PropertyPaneTextField('siteURL', {
                    label: "Site URL"
                  }),
                  PropertyPaneTextField('list', {
                    label: "List Name"
                  })
                ]
              }
            ]
          }
        ]
      };
    }
In the file, <Source DIRECTORY>\src\webparts\locations\LocationsWebPart.manifest.json, you can set defaults for each proprieties.
Below is the modified locationsWebPart.manifest.json (Changes in BOLD):
{
  "$schema": "https://developer.microsoft.com/json-schemas/spfx/client-side-web-part-manifest.schema.json",
  "id": "857eda85-16db-4e19-9ae1-45988ade0b64",
  "alias": "LocationsWebPart",
  "componentType": "WebPart",
  "version": "*",
  "manifestVersion": 2,
  "requiresCustomScript": false,
  "supportedHosts": ["SharePointWebPart"],
  "preconfiguredEntries": [{
    "groupId": "5c03119e-3074-46fd-976b-c60198311f70",
    "group": { "default": "Other" },
    "title": { "default": "Locations SPFx Webpart" },
    "description": { "default": "Displays a list of locations of SI-CO, Inc" },
    "officeFabricIconFontName": "Page",
    "properties": {
      "title": "Locations SPFx WebPart",
      "description": "A List of Location for SI-CO, Inc",
      "siteURL": "<URL OF SITE COLLECTION>",
      "list": "Name of List to Connect to"
    }
  }]
}
Now we have the WebPart properties added, we can use them in our code. For this Demo, I will be modifying the Render function in the <Source DIRECTORY>\src\webparts\locations\locationsLocationsWebPart.ts. file to pull the Title and Description field.
public render(): void {
    this.domElement.innerHTML = `
    <div class="${styles.location}">
      <div class="${styles.container}">
        <span class="${styles.head}">${this.properties.title}</span>
        <span class="${styles.subhead}">${this.properties.description}</span>
        <div id="locations"></div>
      </div>
    </div>`;
    this._renderListAsync();
  }
Finally, I will modify the SharePoint Rest query to use the SiteURL and List Properties.
  private _getListData(): Promise<ISPLists> {
    let today : Date = new Date();
    let restQuery : string = `${this.properties.siteURL}/_api/Web/Lists/GetByTitle('${this.properties.list}')/items?`;
    restQuery += "&$select=Id,Title,State,Address,City,Zip,Phone,Email";
    return this.context.spHttpClient.get( restQuery ,SPHttpClient.configurations.v1)
    .then((response: SPHttpClientResponse) => {
      return response.json();
    });
  }
Now you can run gulp serve –nobroswer in the VS CODE Terminal, and after the WebPartcompiles, Open the SharePoint Workbench up in your browser by navigating to <SharePoint Site>/_layouts/workbench.aspx. You will need to add the webpart and point it to the locations list creating in Part Two of this demo.