

1,738 words, 9 minutes read time.
Introduction:
3D printing has transformed the way we approach product design and customization. For phone accessories, this technology offers endless possibilities, allowing users to create truly personalized and functional items. From phone cases to stands, charging docks to headphone holders, 3D printing enables you to bring your unique vision to life with ease. But creating high-quality custom accessories is no easy task. Whether you’re a hobbyist looking to design your own accessories or an entrepreneur looking to start a small business, understanding the fundamentals of 3D printing is crucial to success. In this guide, we will walk you through everything you need to know to create custom 3D printed phone accessories from scratch, covering design, material selection, printing techniques, and more.
Types of Custom 3D Printed Phone Accessories:
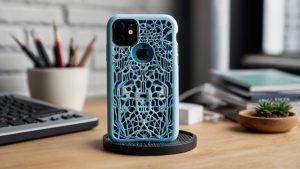
When it comes to customizing your phone, there’s no limit to what you can create. The variety of phone accessories that can be 3D printed is vast, each offering unique functionality, style, and convenience. One of the most popular and essential accessories is the phone case. Custom phone cases can be designed to reflect your personality, whether it’s through intricate designs, bold colors, or added features like cardholders. With 3D printing, you can also integrate additional elements such as stands, grips, or even integrated battery packs directly into the case.
Another common accessory is the phone stand or holder. 3D printing allows you to design stands that fit perfectly with your phone model and use case. You can create multi-functional stands, such as those that also serve as charging stations, or simple, compact designs perfect for watching videos hands-free.
Charging docks are also a great way to leverage 3D printing to enhance your phone’s functionality. These can be customized to hold your phone securely while charging, with additional compartments for cables or other small accessories. Pop sockets and grips, which are growing in popularity, can also be 3D printed to suit your taste. These are small accessories that attach to the back of your phone to help with gripping the device more comfortably. They can be customized with unique textures, colors, or logos.
Other practical items include screen protectors, wireless charging pads, and camera lens covers, all of which can be designed to perfectly match the size and specifications of your phone, offering an unparalleled level of customization.
Designing Your Own 3D Printed Accessories:
Designing your own 3D printed phone accessories is the first step in the process. Fortunately, there are a variety of design software tools that make this process easier than ever before. Tinkercad, for example, is a free, beginner-friendly tool that lets you create designs quickly and easily. For more advanced users, Autodesk Fusion 360 offers robust design features for more complex, precise work. SolidWorks is another high-end tool, particularly well-suited for those who need detailed engineering specifications and simulation capabilities.
When designing a custom phone accessory, it’s important to focus on the specific needs of the user. For example, if you’re designing a phone case, you’ll want to ensure it provides the necessary protection while maintaining an aesthetic appeal. While appearance is important, functionality and practicality should never be overlooked. If your design is a charging dock, make sure it has the correct dimensions and structural integrity to hold the phone securely without damaging it.
Additionally, think about how users will interact with the accessory. If you’re creating a phone grip, for instance, the texture of the surface should feel comfortable to hold, with a design that allows for easy application and removal. Another consideration is modularity – can your design be customized further? Can components be swapped out, or does the design work with multiple phone models? These are essential factors that contribute to a successful product.
Choosing the Right Material:
One of the most significant factors in creating durable and functional 3D printed phone accessories is selecting the right material. The material you choose directly impacts the strength, flexibility, and overall quality of your product.
PLA (Polylactic Acid) is one of the most commonly used materials for 3D printing. It is a biodegradable plastic made from renewable resources like corn starch or sugarcane. While PLA is easy to print and offers a clean, smooth finish, it is not as durable as some other materials and may not withstand high temperatures or heavy impacts. This makes it less suitable for items that will experience frequent wear and tear, like phone cases.
ABS (Acrylonitrile Butadiene Styrene) is another widely used material that is more durable than PLA. It is strong, impact-resistant, and capable of withstanding higher temperatures. ABS is an excellent choice for phone cases and other accessories that need to provide substantial protection. However, it can be trickier to print with and may require a heated bed to prevent warping.
TPU (Thermoplastic Polyurethane) is a flexible, rubber-like material ideal for accessories like grips and phone cases that need to absorb shocks. TPU is durable, flexible, and resistant to abrasion, making it a fantastic option for items that need to offer both protection and comfort.
PETG (Polyethylene Terephthalate Glycol) is another material that’s gaining popularity in 3D printing. It is known for its durability, resistance to impact, and flexibility, making it an excellent option for phone accessories. PETG also has a lower tendency to warp, which makes it easier to print than ABS.
The choice of material depends on the specific requirements of your project. Consider factors such as the item’s intended use, how durable it needs to be, and whether you need flexibility or rigidity. The material will also impact the finish and texture of your product, so it’s important to experiment and test different materials to find the one that best suits your design.
Preparing for Printing:
Once you have your design and material selected, it’s time to prepare for printing. The first step is to ensure your 3D printer is set up correctly. For those new to 3D printing, entry-level printers like the Creality Ender series are a great place to start, offering reliability and decent quality for beginners. For more advanced users, options like the Prusa i3 MK3S provide greater customization and superior print quality.
Before you begin printing, you’ll need to level the print bed to ensure that the first layer of your print adheres properly. Many printers today come with automatic bed leveling systems, but for those without this feature, it’s essential to manually adjust the bed to achieve the right height.
After that, you’ll need to slice your design, which is the process of converting your 3D model into machine-readable instructions. Software like Cura or PrusaSlicer is often used for slicing. These programs allow you to adjust important parameters like print resolution, layer height, and infill density. The resolution determines how fine the print layers are, while the infill affects the strength and weight of the print.
Once everything is set up, it’s time to start the print! During the process, monitor the print to ensure that the layers are being laid down correctly and there are no issues with the print bed or material feeding.
Post-Processing Tips:
After your 3D print has finished, there may be some post-processing required to ensure a polished, finished product. This can include removing any support structures that were used during the print. Depending on the material, supports can be easily removed by hand or may require the use of tools like pliers or tweezers.
Sanding is another crucial post-processing step. Sanding can help smooth out rough edges, remove imperfections, and create a professional, glossy finish. For more intricate designs, wet sanding may be necessary to avoid damaging the print’s fine details.
Once your accessory is properly sanded and smoothed, you can move on to painting or finishing. Use appropriate paints for 3D printed materials to ensure a good bond. Acrylic paints are a popular option for most plastics, and applying a clear coat can help preserve the paint while also providing additional protection against wear and tear.
Finally, you may need to assemble multiple components if your design includes moving parts or pieces that need to be connected. Make sure that all components fit together as expected and that everything is secure.
Quality Control and Testing:
Before releasing your custom accessory into the world, it’s important to test its functionality and durability. For phone cases, test for an accurate fit on a phone model, ensuring that buttons, camera lenses, and charging ports are all accessible. For items like charging docks, ensure that they hold the phone in place while charging and that the phone is secure during use.
Perform stress tests to check the structural integrity of your print. Drop the item, twist it, or apply pressure to see if it holds up. If it doesn’t pass these tests, go back to the drawing board and tweak the design for better durability.
Conclusion:
Creating custom 3D printed phone accessories is a fantastic way to personalize your devices and even start your own small business. From designing and selecting the right materials to printing and testing your products, each step is crucial to achieving success. With the right tools, knowledge, and patience, you can create accessories that are not only functional but also uniquely your own. By following the steps outlined in this guide, you’ll be well on your way to mastering the art of 3D printing and unleashing your creativity.
The future of 3D printing for phone accessories looks bright, and with platforms like Etsy and other marketplaces, there has never been a better time to share or sell your creations. Whether you’re a hobbyist or aspiring entrepreneur, the world of custom 3D printed phone accessories awaits.
Sources
- Thingiverse – 3D Printing Designs
- 3D Print Beginner – Tutorials and Guides
- 3D Hubs – Custom Printing Services
- Simplify3D – 3D Printer Software and Tips
- i.materialise – 3D Printing Services
- Make: Projects – Guides on Creating 3D Printed Items
- 3D Printing Media Network – Industry Insights
- All3DP – 3D Printing News and Resources
- Printables – Free 3D Printable Designs
- Adam’s Polishes Blog – 3D Printing Automotive Accessories
- Autodesk – 3D Printing Solutions and Software
- MakeUseOf – 3D Printing iPhone Accessories
- CNBC – How 3D Printing Can Accelerate iPhone Accessory Manufacturing
- 3DPrinting.com – 3D Printed iPhone Cases
Disclaimer:
The views and opinions expressed in this post are solely those of the author. The information provided is based on personal research, experience, and understanding of the subject matter at the time of writing. Readers should consult relevant experts or authorities for specific guidance related to their unique situations.