
1,383 words, 7 minutes read time.

If you’ve been 3D printing for a while, you’re probably all too familiar with the frustration that comes with removing support structures. We love supports because they allow us to print complex geometries and overhangs, but when they refuse to come off cleanly, leaving behind scars, gouges, or even breaking parts of the print—well, it can feel like they’re doing more harm than good.
In this blog post, we’re going to dive deep into how you can optimize your 3D print support structures to make them easier to remove, without sacrificing the quality or strength of your final print. Whether you’re using FDM (Fused Deposition Modeling) or SLA (Stereolithography), these tips will help you get smoother prints with less post-processing hassle.
What Are Support Structures in 3D Printing?
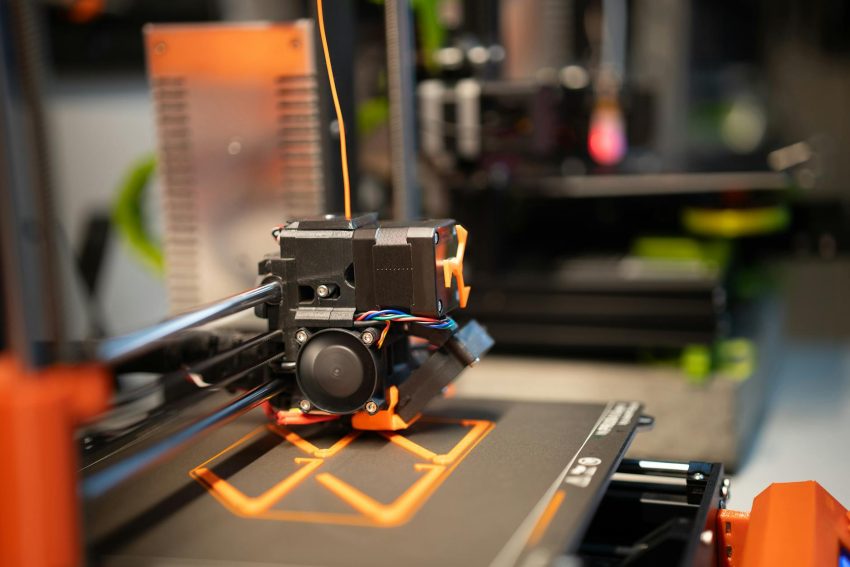
Before we jump into the how-to, let’s cover the basics. In 3D printing, support structures are temporary scaffolds that hold up parts of your model that don’t have direct contact with the print bed. They’re essential for printing overhangs, bridges, and other complex designs that would otherwise collapse mid-print.
Supports are necessary, but they can also be a major pain to remove if they aren’t set up correctly. Here are the most common issues:
- Hard-to-remove supports that leave behind residue or damage the print.
- Excessive support use, wasting material.
- Supports scarring the surface of the model.
- Supports fused to the print, especially with high-temperature materials.
Fortunately, with a little knowledge and some fine-tuning of your slicing settings, you can make support removal far easier and cleaner.
1. Optimize Support Placement: Less Is More
One of the most common mistakes is letting the slicing software generate too many supports automatically. While slicers like Cura and PrusaSlicer do a decent job, they’re not perfect. Often, they’ll create unnecessary supports that are hard to remove and waste filament.
Manual support placement can solve this problem. Most slicers allow you to manually paint or place supports only where needed. This gives you far more control over how much support material is used, and it helps minimize the areas where removal will be difficult.
According to the experts at All3DP, “It’s always best to manually place supports when possible, especially for more delicate or artistic prints” . Try to focus supports on areas with steep overhangs (anything over 45°) and bridges, but leave out areas where gravity alone would be enough to support the model.
2. Adjust Your Support Settings: Dial in the Details
The key to making support removal easier lies in the slicer settings. While default settings might work fine for simple prints, optimizing them can drastically reduce post-processing headaches. Here are some key settings to tweak:
Support Density
Support density refers to how tightly packed the support structure is. Lower density supports are easier to remove but may not provide enough stability, whereas higher densities are more stable but harder to remove. A balance is necessary, and for most FDM printers, setting the density between 10-15% should suffice.
Support Z-Distance
The Z-distance is the gap between the support structure and the model. If this gap is too small, the supports may fuse with the model, making them almost impossible to remove. Too large a gap, however, and the model might sag. For most materials, a Z-distance of 0.2 to 0.3 mm works best for easy removal without compromising print quality.
Support Overhang Angle
Most slicers automatically place supports under any overhangs exceeding a specific angle. The default is often set to 45°, but depending on the model, you might be able to increase this to 60°. This reduces the amount of support material used, making the print cleaner and faster while also minimizing post-processing.
3. Explore Different Support Structures
Not all support structures are created equal. Many slicers offer a variety of support types, each with different benefits depending on the model you’re printing. Let’s break down a few common types:
- Grid Supports: These are the default for many slicers and work well for large, simple prints but can be difficult to remove due to the rigid structure.
- Tree Supports: A newer option in slicers like Cura, tree supports are branched, organic-like structures that minimize contact with the model. They’re great for intricate designs, as they’re easier to remove and reduce scarring.
- Lines or Zig-Zag Supports: These are easy to remove but might not provide the stability needed for more complex prints.
Experimenting with these different types can greatly improve the print outcome. For delicate or artistic prints, tree supports or lines may offer the easiest removal with minimal post-processing.
4. Consider Breakaway or Dissolvable Supports
If you’re constantly struggling with removing standard supports, it might be time to try breakaway supports or even dissolvable supports.
- Breakaway supports are designed to snap off cleanly from the print. They often leave a better finish than traditional supports, though you might still need to sand or smooth the surface afterward.
- Dissolvable supports, made from materials like PVA or HIPS, can be a lifesaver for complex prints. These supports can be dissolved in water (PVA) or limonene (HIPS), leaving your print completely support-free without the risk of damaging it.
Using a dual-extruder 3D printer or swapping materials during a print will allow you to take advantage of these supports. While they’re more expensive, the time and effort saved can make them well worth it for certain projects.
5. Use Brims and Rafts Wisely
Brims and rafts are often overlooked, but they play an essential role in support removal. These additions provide a solid foundation for your print, improving bed adhesion and making it easier to remove supports once the print is complete.
- Brims: These are thin layers of plastic that extend outward from the model. They help with bed adhesion and can also make it easier to remove supports by providing more material to grip.
- Rafts: Rafts are thicker and sit under the entire model. They’re more useful for delicate prints where strong bed adhesion is necessary, but they can be harder to remove and may require additional cleanup.
For most prints, a brim will provide enough support without the hassle of dealing with a raft. However, for tall or delicate models, a raft can help ensure that your supports come off smoothly.
6. Post-Processing: Finishing Touches for a Clean Print
Even with the best slicing settings, some prints will still require post-processing. However, using the right tools and techniques can make support removal easier and leave a smoother finish on your print.
- Deburring Tools: These are excellent for removing small bits of leftover support material without damaging the model. A sharp hobby knife or small file can also be useful for detailed work.
- Sanding: For FDM prints, light sanding with fine-grit sandpaper (400-800 grit) will help smooth out any imperfections left by supports. For resin prints, wet sanding is typically more effective.
- Heat Gun or Soldering Iron: For stubborn supports, applying a little heat can soften the plastic and make removal easier. Be careful not to overheat the model, as this can cause warping or melting.
7. Advanced Support Techniques with Slicer Settings
Some slicers now include experimental support techniques that can drastically improve support removal. For example:
- Support Blockers: These allow you to exclude certain areas from getting supports. You can strategically block supports in areas where they’re hard to reach or unnecessary, while still supporting critical overhangs.
- Variable Density Supports: With slicers like PrusaSlicer, you can set variable densities for different parts of the support structure. Denser supports near the base can ensure stability, while lighter supports near the model make removal easier.
These advanced settings give you even more control over support placement, reducing waste and making post-processing simpler.
Conclusion: Mastering Support Structures for Clean 3D Prints
While supports are an essential part of 3D printing, they don’t have to be a source of frustration. By optimizing your support placement, adjusting slicer settings, and exploring different types of supports, you can make support removal easier, faster, and cleaner. Don’t forget to experiment with different settings to find what works best for your specific printer and material—every print is different, and a little fine-tuning can go a long way.
As you continue refining your support strategies, you’ll find that post-processing becomes less of a chore and your prints will look smoother and more professional.